Automate Job Application Form for HR Teams Using CraftMyPDF & n8n
 By CraftMyPDF Updated June 26, 2026
Stop manually formatting job applications. This guide shows HR teams how to automatically turn form submissions into clean, branded PDF applications using n8n and CraftMyPDF - delivered to Google Drive or email in seconds.
TL;DR
This guide shows HR teams how to automate job application PDF generation using n8n (a workflow automation tool) and CraftMyPDF (a PDF generation API).
When a candidate submits a job application form, n8n captures the data via a webhook, sends it to CraftMyPDF, and generates a professionally formatted PDF application document, automatically saved to Google Drive or emailed to HR.
- What you’ll build: A workflow where form submissions trigger automatic PDF generation of formatted job applications.
- Cost: Free tiers available for both tools. CraftMyPDF offers 100 PDFs/month free. n8n is free if self-hosted.
- Technical skill needed: Minimal. n8n is a visual workflow builder.
- Best for: HR teams, recruiters, staffing agencies, or any business processing job applications that need standardized PDF records.
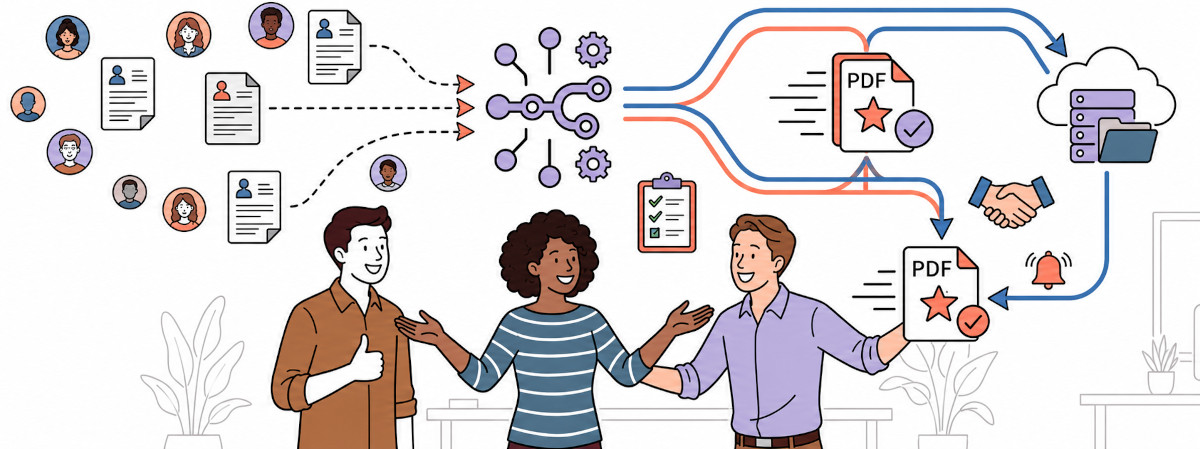
Most HR teams still handle job applications the same way: a candidate fills out a form, someone on the team copies the data into a Word doc or spreadsheet, formats it, saves it as a PDF, and files it away. Multiply that by 50 or 200 applicants per open role, and you’re spending hours on formatting instead of evaluating candidates.
The real cost isn’t just time – it’s inconsistency. Every manually created application looks slightly different. Fields get missed. Files get named wrong. When hiring managers compare candidates side by side, they’re comparing documents that don’t even have the same layout.
Automated job application PDF generation solves both problems. A candidate submits a form, and within seconds, a clean, standardized PDF is generated with all their information in the right place – and delivered to your Google Drive, inbox, or ATS.
What You’ll Build
A workflow where a candidate submits a job application form → n8n captures the data via webhook → CraftMyPDF generates a formatted PDF → the PDF is automatically saved to Google Drive or emailed to HR.
- Cost: Free tiers available for both tools. CraftMyPDF offers 100 PDFs/month free. n8n is free if self-hosted.
- Technical skill needed: Minimal. n8n is a visual workflow builder.
- Time to set up: Under 30 minutes.
- Best for: HR teams, recruiters, staffing agencies, or any business processing job applications that need standardized PDF records.
1. How Automate Job Application Form Works
Here’s the flow:
- Candidate submits a form via any form tool (Typeform, Google Forms, Tally, or n8n’s own form node)
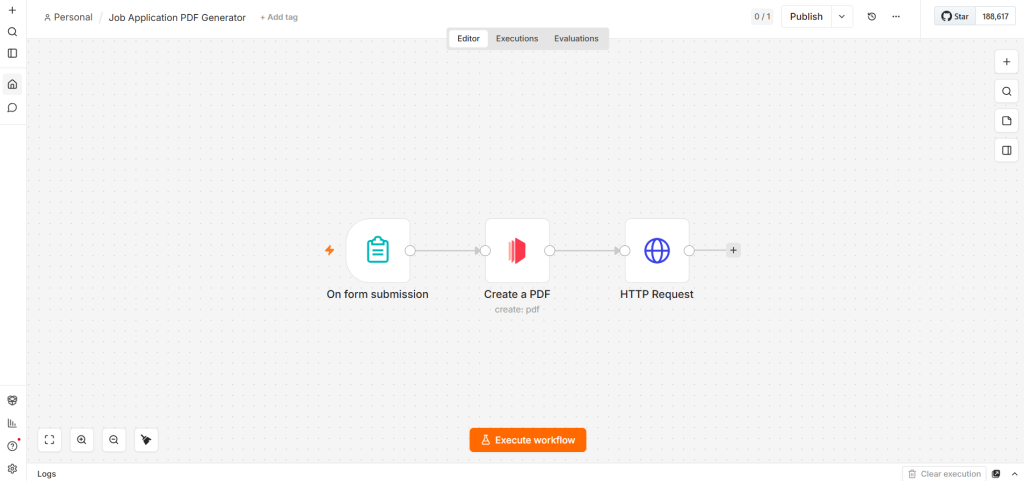
- n8n receives the data via webhook trigger
- n8n sends data to CraftMyPDF using the built-in CraftMyPDF node
- CraftMyPDF generates the PDF and returns a download URL
- n8n downloads the PDF using an HTTP Request node with the file URL
- n8n delivers the PDF by saving to Google Drive, emailing to HR, or both
Total time per application: 3-5 seconds vs. manual formatting.
2. Prerequisites
| Service | What You Need | Free Tier? |
|---|---|---|
| n8n | Self-hosted or n8n Cloud account | Yes (self-hosted is free) |
| CraftMyPDF | Account + API key | Yes (100 PDFs/month) |
| Form Tool | Any tool that supports webhooks (Typeform, Tally, Google Forms + Zapier, or n8n Form Trigger) | Varies |
| Google Drive (optional) | For storing generated PDFs | Yes |
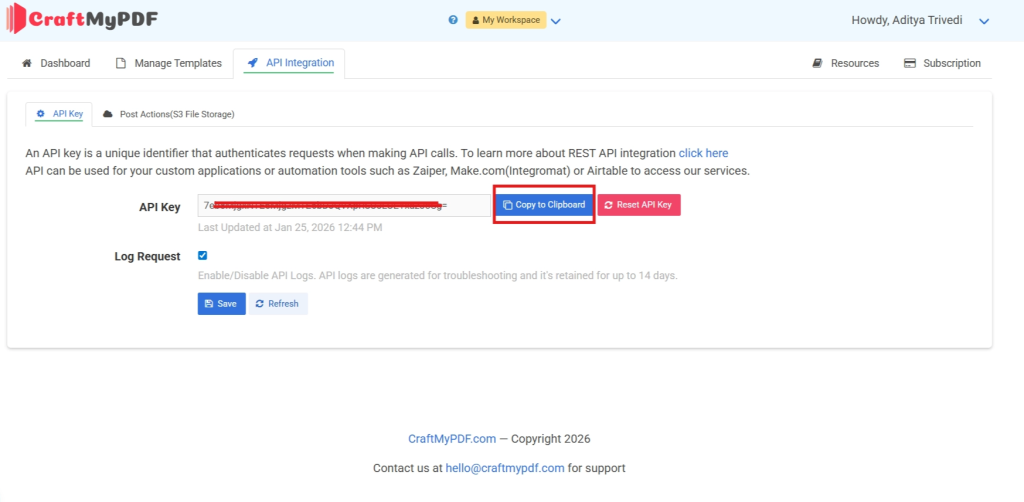
Get Your CraftMyPDF API Key
- Sign up at CraftMyPDF.
- Go to API Integration tab.
- Copy your API Key.
3. Setting Up Your PDF Template on CraftMyPDF
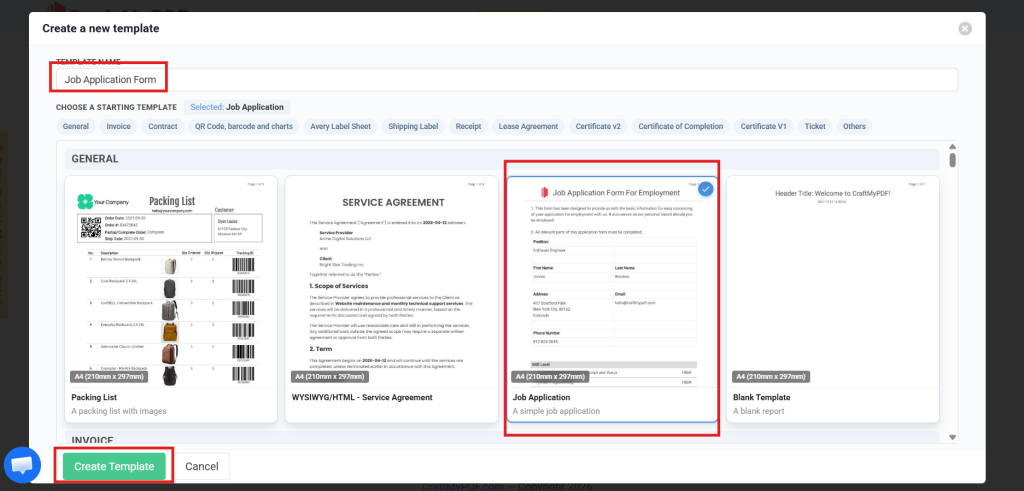
Step 3.1: Create a New PDF Template
- Click Manage Templates tab.
- Click Create New PDF Template.
- Enter a template name (e.g., “Job Application Form”).
- Under Choose a Starting Template, select the Job Application template from the list of available templates.
- Click Create Template.
Note: Learn how to create a PDF Template with CraftMyPDF, click here
Step 3.2: Configure Template Data Fields
Click the Data tab in the editor. The default Job Application template comes with pre-filled data fields. Modify them to match your requirements. Remove address_street2, and add name_of_company:
{
  "first_name": "James",
  "last_name": "Brookes",
  "address_street": "407 Stratford Park",
  "address_city": "New York City",
  "address_state": "Colorado",
  "address_postal": "80162",
  "address_country": "United States",
  "email": "hello@craftmypdf.com",
  "phone_number": "812-824-3045",
  "name_of_company": "Craftmypdf",
  "position": "Software Engineer",
  "skills": [
    {
      "name": "Front-end programming: Javascript and Vue.js",
      "level": "high"
    },
    {
      "name": "Python Programming",
      "level": "high"
    },
    {
      "name": "Agile project management",
      "level": "mid"
    }
  ]
}
Click Validate and Format JSON to apply.
The Data tab in CraftMyPDF template editor with JSON fields for the job application form including name, address, skills array
Step 3.3: Design the PDF Template Layout
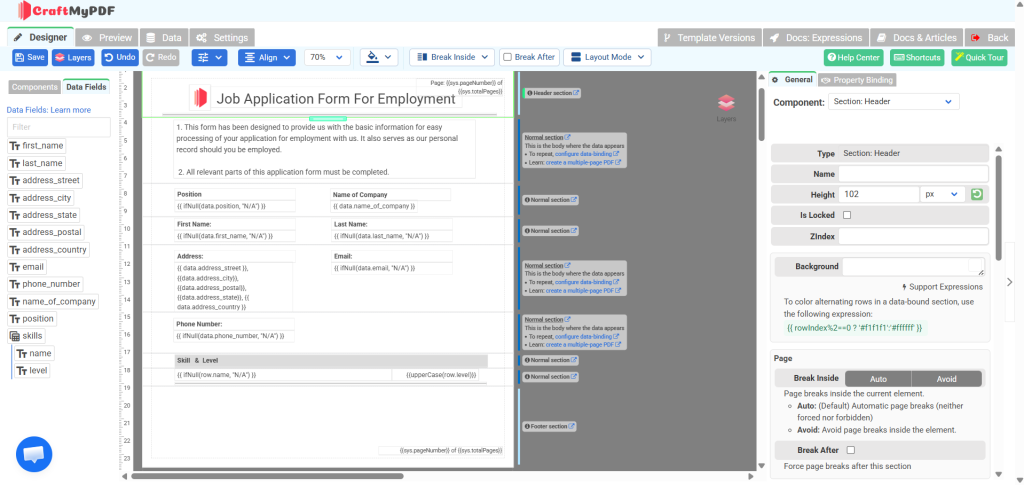
Switch to the Designer tab. The template already has a pre-built layout with bound data fields. You can drag and drop components, resize, and rearrange them to adjust the layout according to your needs. The key sections are:
- Header: Company logo + “Job Application” title
- Personal Info Section: First name, last name, DOB, email, phone number
- Address Section: Street, city, state, postal code, country
- Job Details Section: Company name, position applied for
- Skills Section: Skill names with proficiency levels
Text components are bound to data fields using expressions like {{ data.first_name }}, {{ data.position }}, {{ data.skills[0].name }}, etc.
Once you’re done designing, click the Preview tab to check how the final PDF will look with your sample data.
Step 3.4: Save and Copy the Template ID
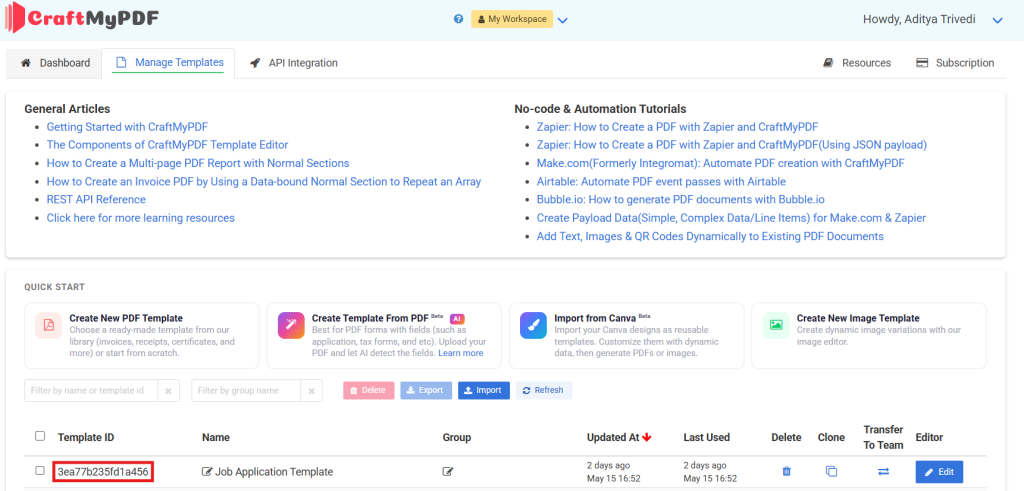
- Click Save.
- Go back to Manage Templates.
- Copy the Template ID displayed next to your template name.
4. Building the n8n Workflow
Step 4.1: Create a New Workflow
- Open n8n (self-hosted or cloud) -> Click New Workflow.
- Name it “Job Application PDF Generator”.
Step 4.2: Add the Form Trigger Node
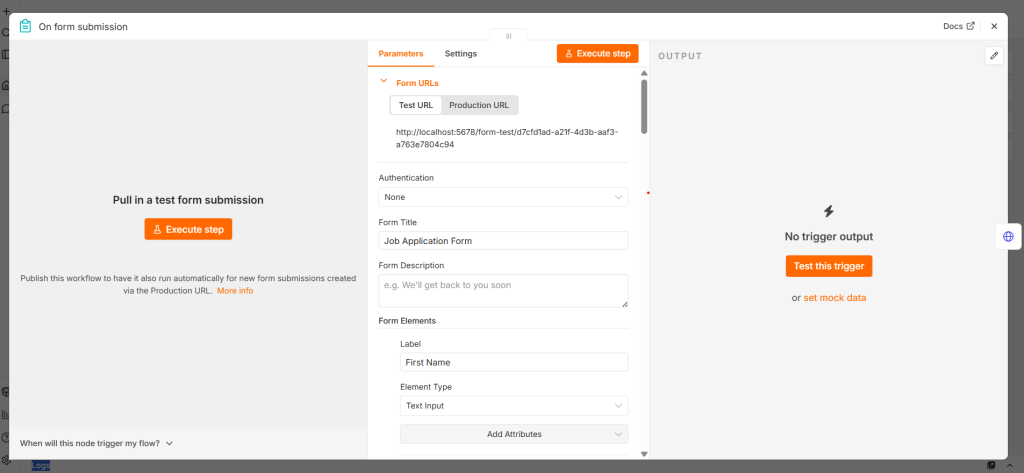
- Click + -> Search “n8n Form Trigger” -> Select it.
- Enter a Form Title (e.g., “Job Application Form”). This is the heading candidates will see on the form page.
- Click Add Form Element to add each field. For every element, set:
- Label: the field name displayed on the form (e.g., “First Name”)
- Element Type: the input type (Text, Email, Number, etc.)
- Add the following form elements:
| Label | Element Type |
|---|---|
| First Name | Text |
| Last Name | Text |
| Phone Number | Number |
| Address Street | Text |
| Address City | Text |
| Address State | Text |
| Address Postal | Text |
| Address Country | Text |
| Company Name | Text |
| Position | Text |
| Skill 1 Name | Text |
| Skill 1 Level | Text |
| Skill 2 Name | Text |
| Skill 2 Level | Text |
| Skill 3 Name | Text |
| Skill 3 Level | Text |
5. After adding all the form elements, click the X (close) button to close the Form Trigger configuration panel.
Step 4.3: Add the CraftMyPDF Node
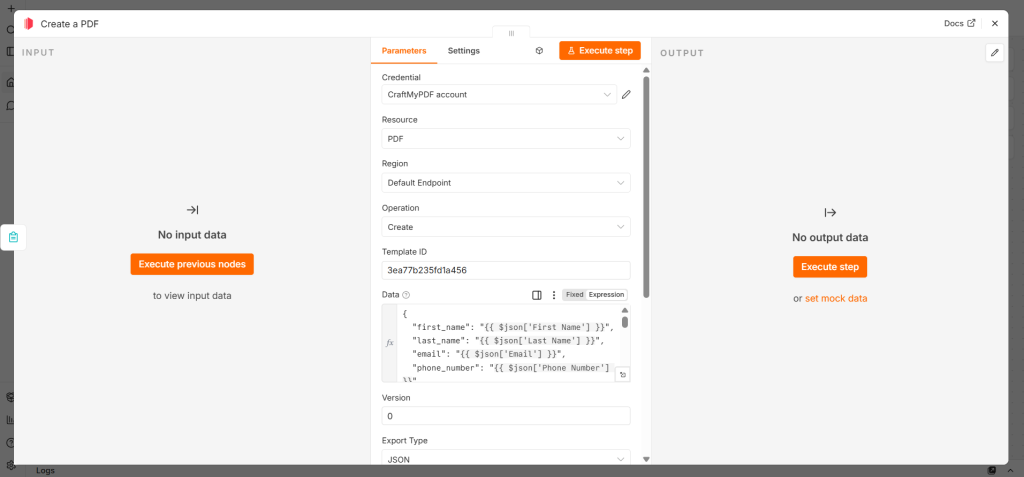
- Click + after the trigger -> Search “CraftMyPDF” -> Select it.
- Click Create PDF to select the operation.
- Fill in the following parameters:
- Credential: Paste your CraftMyPDF API key, and save.
- Template ID: Paste your template ID from Step 3.4.
- In the Data field, paste the following JSON:
{
  "first_name": "{{ $json['First Name'] }}",
  "last_name": "{{ $json['Last Name'] }}",
  "email": "{{ $json['Email'] }}",
  "phone_number": "{{ $json['Phone Number'] }}",
  "address_street": "{{ $json['Address Street'] }}",
  "address_city": "{{ $json['Address City'] }}",
  "address_state": "{{ $json['Address State'] }}",
  "address_postal": "{{ $json['Address Postal'] }}",
  "address_country": "{{ $json['Address Country'] }}",
  "name_of_company": "{{ $json['Company Name'] }}",
  "position": "{{ $json['Position'] }}",
  "skills": [
    { "name": "{{ $json['Skill 1 Name'] }}", "level": "{{ $json['Skill 1 Level'] }}" },
    { "name": "{{ $json['Skill 2 Name'] }}", "level": "{{ $json['Skill 2 Level'] }}" },
    { "name": "{{ $json['Skill 3 Name'] }}", "level": "{{ $json['Skill 3 Level'] }}" }
  ]
}Important: The n8n Form Trigger outputs field names exactly as you typed the labels (with spaces and capitalization). Use bracket notation $json[‘Field Name’] to reference them, not dot notation like $json.field_name.
Step 4.4: Download the Generated PDF File
- Click + -> Add an HTTP Request node.
- Configure:
| Field | Value |
|---|---|
| Method | GET |
| URL | {{ $json.file }} (maps to the PDF URL returned by the CraftMyPDF node) |
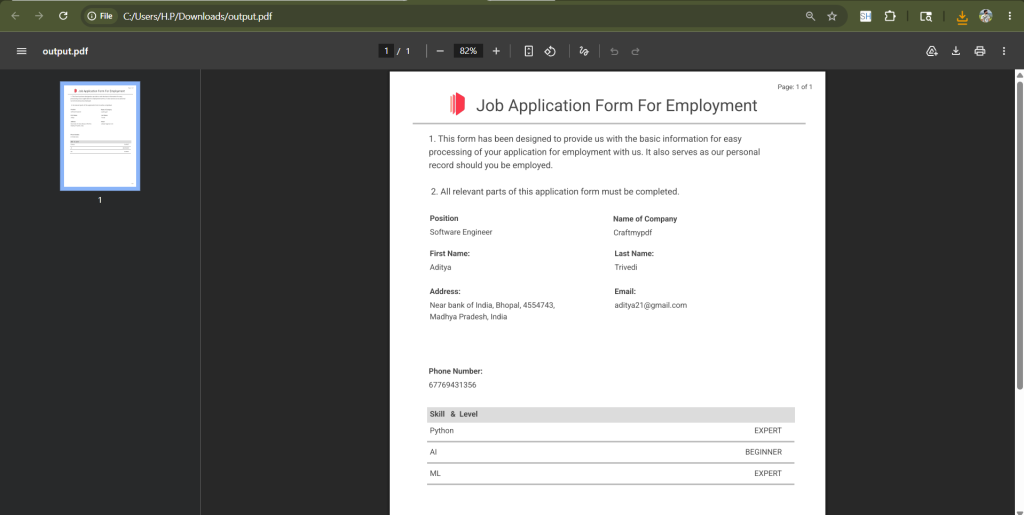
Once this node executes, you will see a download button in the node’s output panel. You can click it to directly download and verify the generated PDF.
Step 4.5: Save PDF to Google Drive (Optional)
- Click + -> Search “Google Drive” -> Select Upload File.
- Connect your Google account.
- Configure:
| Field | Value |
|---|---|
| Folder | Select your target folder (e.g., “Job Applications”) |
| File Name | {{ $('Webhook').item.json.full_name }}_application.pdf |
| Binary Property | data (from the HTTP download node) |
Step 4.6: Send PDF via Email Notification (Optional)
- Click + -> Search “Send Email” or “Gmail” -> Select it.
- Configure:
| Field | Value |
|---|---|
| To | hr@yourcompany.com |
| Subject | New Application: {{ $('Webhook').item.json.position_applied_for }} - {{ $('Webhook').item.json.full_name }} |
| Body | New job application received. PDF attached. |
| Attachment | Binary data from the download node |
5. Testing the Complete Flow
- Click Test Workflow in n8n.
- Submit a test entry through your form (or use the “Test URL” if using Webhook trigger with test data).
- Check each node’s output:
- Trigger node: should show the form data
- CraftMyPDF node: should return
{"status": "success", "file": "https://..."} - Download node: should show binary file data with a download button to directly download the PDF
- Google Drive / Email node: should confirm delivery
- Click the download button in the Download node’s output to open the PDF and verify all fields are populated correctly.
6. Troubleshooting
| Problem | Cause | Solution |
|---|---|---|
| 401 Unauthorized from CraftMyPDF | Wrong or missing API key | Re-copy from API Integration tab |
| 404 from CraftMyPDF | Wrong template ID | Re-copy from Manage Templates page |
| Empty fields in PDF | Field name mismatch | Names are case-sensitive. Ensure exact match between JSON keys and template data fields |
| Webhook not receiving data | Workflow not active, or wrong URL | Activate workflow, use Production URL (not Test URL) |
| PDF link expired | Default expiration too short | Increase expiration value in the request body (value is in minutes) |
| Google Drive upload fails | OAuth token expired | Reconnect Google credentials in n8n |
| Large cover letter text cut off | Template text area too small | Resize the text component in CraftMyPDF editor or enable auto-expand |
Conclusion
You now have a fully automated job application PDF generation workflow. With n8n handling the workflow automation and CraftMyPDF generating professional PDF documents, every job application that comes through your form is automatically converted into a clean, standardized PDF. No manual formatting, no copy-pasting, no delays.
Once active, this automation runs 24/7. HR receives a formatted job application PDF in their Google Drive or inbox within seconds of form submission.
Sign up for CraftMyPDF (free, no credit card) and download n8n to build this job application automation in under 30 minutes.
Additional Resources and Documentation
- Automate PDF Generation with n8n and CraftMyPDF – Video tutorial showing n8n + CraftMyPDF automation for a service contract. Use it as a reference for the workflow setup.
- CraftMyPDF API Documentation
- n8n Documentation
- n8n Webhook Node Guide
Start generating PDFs today
Design templates in the browser and generate pixel-perfect PDFs via a simple REST API. 50 free PDFs every month, no credit card required.
Keep reading
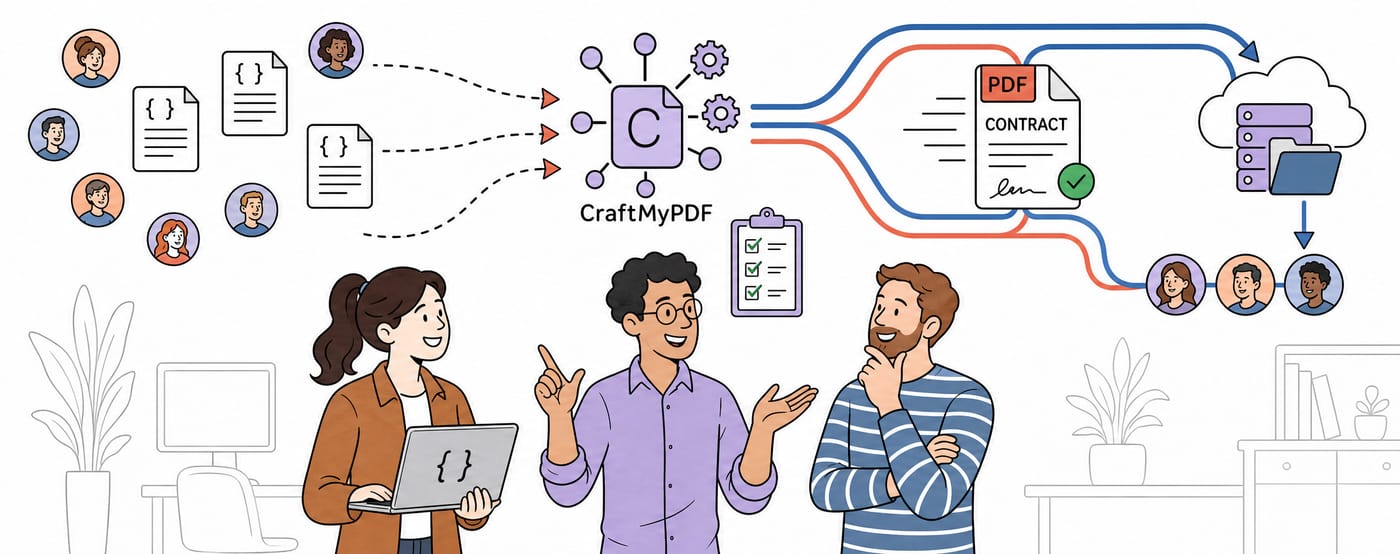
CraftMyPDF vs DocuSign vs PandaDoc: Which eSignature API Should Developers Choose in 2026?
DocuSign, PandaDoc or CraftMyPDF? Compare eSignature API pricing, webhooks, embedded signing, eIDAS levels and the steps from data to a signed PDF.
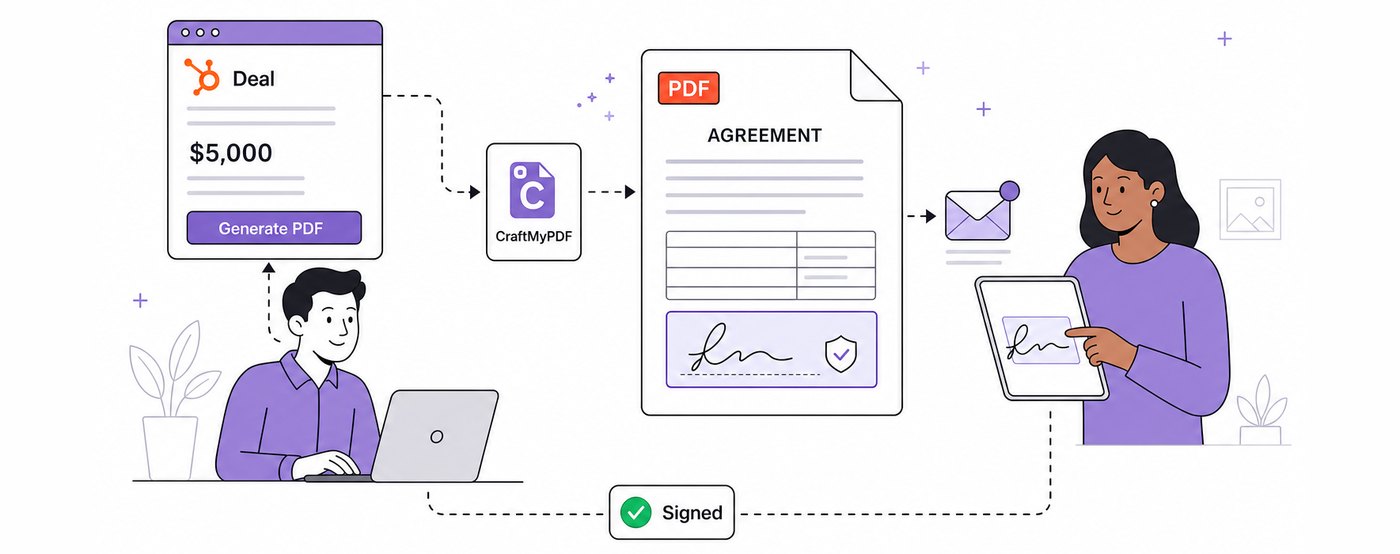
How To Add eSignatures To HubSpot Deals (Without Leaving Your CRM)
Send HubSpot deal documents for eSignature straight from the Deal record: install the CraftMyPDF app, build a signature-ready template, and track signed PDFs.
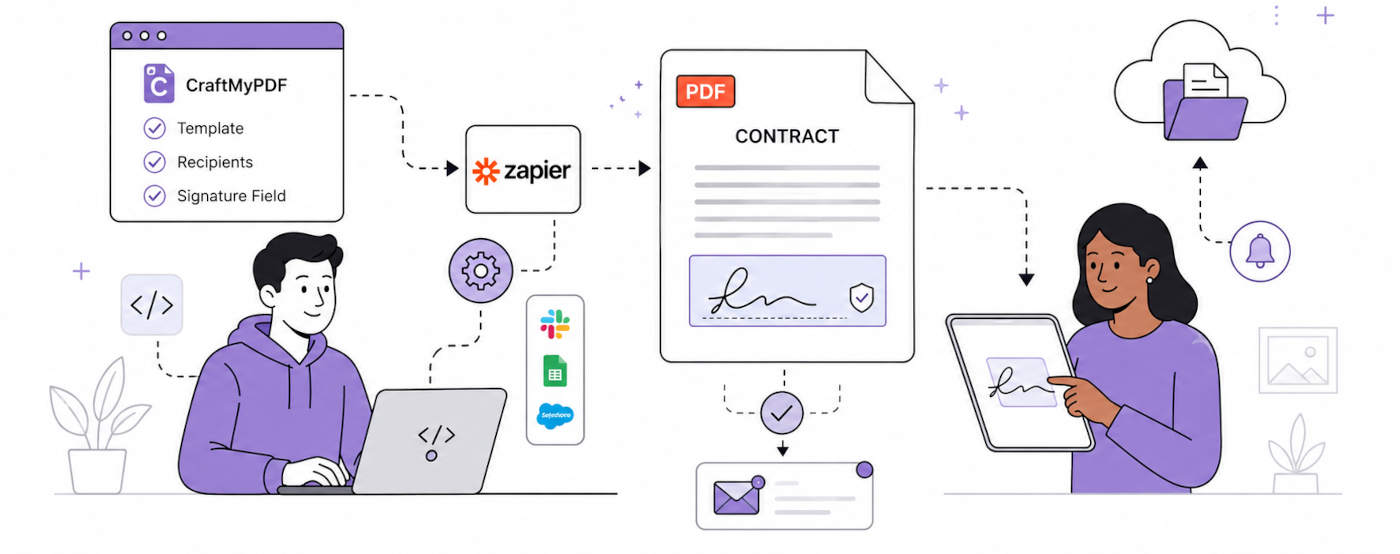
How To Automate eSignatures Using Zapier (with CraftMyPDF)
A step-by-step guide to sending contracts for eSignature automatically: build the template once, trigger it from Zapier, track signing status in CraftMyPDF.